最近公司准备用node写全栈项目,于是花了半天时间熟悉了
egg的文档,整体下来体验良好,不得不说egg确实不错。
快速搭建
$ mkdir egg-example && cd egg-example
$ npm init egg --type=simple
$ npm i可以在官网熟悉下目录结构,知道每个目录的作用。
我自己的理解:
app/controller/**是来接受入参,调用service的方法,得到返回service的结果,最后返回结果,即接口最终数据。app/service/**是来根据参数查询数据库,对数据进行处理转换等业务逻辑,然后将处理好的数据返回。app/model/**是用来定义数据表的每个字段app/router.js用来定义接口路径,接口方法(get、post、delete、put等)config/config.{env}.js用来设置不同环境的配置,config.default.js为默认的配置文件,所有环境都会加载这个配置文件。config.prod.js如果有config.default.js同名配置,则以config.prod.js为准config/plugin.js插件的注册需要在这里写app/middleware/**这里写一些中间件,例如,我们需要对返回接口统一数据格式,就可以写个中间件。
前置工作
1. 安装依赖
$ npm i egg-cors egg-mysql egg-sequelize egg-validate mysql2 -S2. mysql和sequelize配置
// config/local.js
'use strict';
exports.mysql = {
  // 单数据库信息配置
  client: {
    // host
    host: 'xxx',
    // 端口号
    port: '3306',
    // 用户名
    user: 'xxx',
    // 密码
    password: 'xxx',
    // 数据库名
    database: 'xxx',
  },
  // 是否加载到 app 上,默认开启
  app: true,
  // 是否加载到 agent 上,默认关闭
  agent: false,
};
exports.sequelize = {
  dialect: 'mysql',
  username: 'xxx', // 用户名
  password: 'xxx', // 用户密码
  host: 'xxx', // 服务器地址
  port: 3306, //端口
  database: 'xxx', //数据库名
  define: {
    timestamps: false,
    freezeTableName: true,
  },
};
3. 跨域配置、中间件的注册
// 在config.default.js中加入
module.exports = appInfo => {
  // add your middleware config here
  config.middleware = [
    'response',
    'errorHandler',
  ];

  // 配置跨域
  config.cors = {
    origin: '*',
    // {string|Function} origin: '*',
    // {string|Array} allowMethods: 'GET,HEAD,PUT,POST,DELETE,PATCH'
  };
}
// plugin.js
'use strict';
/** @type Egg.EggPlugin */
module.exports = {
// had enabled by egg
// static: {
// enable: true,
// }
sequelize: {
enable: true,
package: 'egg-sequelize',
},
mysql: {
enable: true,
package: 'egg-mysql',
},
validate: {
enable: true,
package: 'egg-validate',
},
cors: {
enable: true,
package: 'egg-cors',
},
};
开始写个接口
1. 路由表中定义接口
// router.js
'use strict';

/**
 * @param {Egg.Application} app - egg application
 */
module.exports = app => {
  const { router, controller } = app;
  const auth = app.middleware.auth();

  // 添加统一的接口前缀
  router.prefix('/api');

  router.get('/', controller.home.index);
  router.get('/user', auth, controller.user.index);
};
2. 创建model,定义数据库
// model/user.js
'use strict';
module.exports = app => {
  const { STRING, INTEGER, TIME, TINYINT } = app.Sequelize;
  const User = app.model.define('user', {
    id: { type: INTEGER, primaryKey: true, autoIncrement: true },
    account: STRING(64),
    password: STRING(64),
    phone: STRING(64),
    create_time: TIME,
    update_time: TIME,
    modify_user_id: INTEGER,
    create_user_id: INTEGER,
    is_delete: TINYINT,
  });
  return User;
};
3. service层写逻辑
// service/user.js
'use strict';
const Service = require('egg').Service;
function toInt(str) {
  if (typeof str === 'number') return str;
  if (!str) return str;
  return parseInt(str, 10) || 0;
}
class UserService extends Service {
  async find(uid) {
    // 假如 我们拿到用户 id 从数据库获取用户详细信息
    const user = await this.ctx.model.User.findByPk(toInt(uid));
    return { user };
  }
}

module.exports = UserService;
4. controller层获取入参,调用service的方法并返回数据
// controller/user.js
'use strict';
const Controller = require('egg').Controller;

class UserController extends Controller {
  async index() {
    const ctx = this.ctx;
    // 参数校验
    this.ctx.validate({
      id: { type: 'string',required: true },
    }, ctx.query);

    const userId = ctx.query.id;
    const user = await ctx.service.user.find(userId);
    ctx.body = user;
    ctx.res.success();
  }
}

module.exports = UserController;
注:1. get请求使用this.ctx.query获取参数;post使用this.ctx.request.body来获取参数,更多参考文档
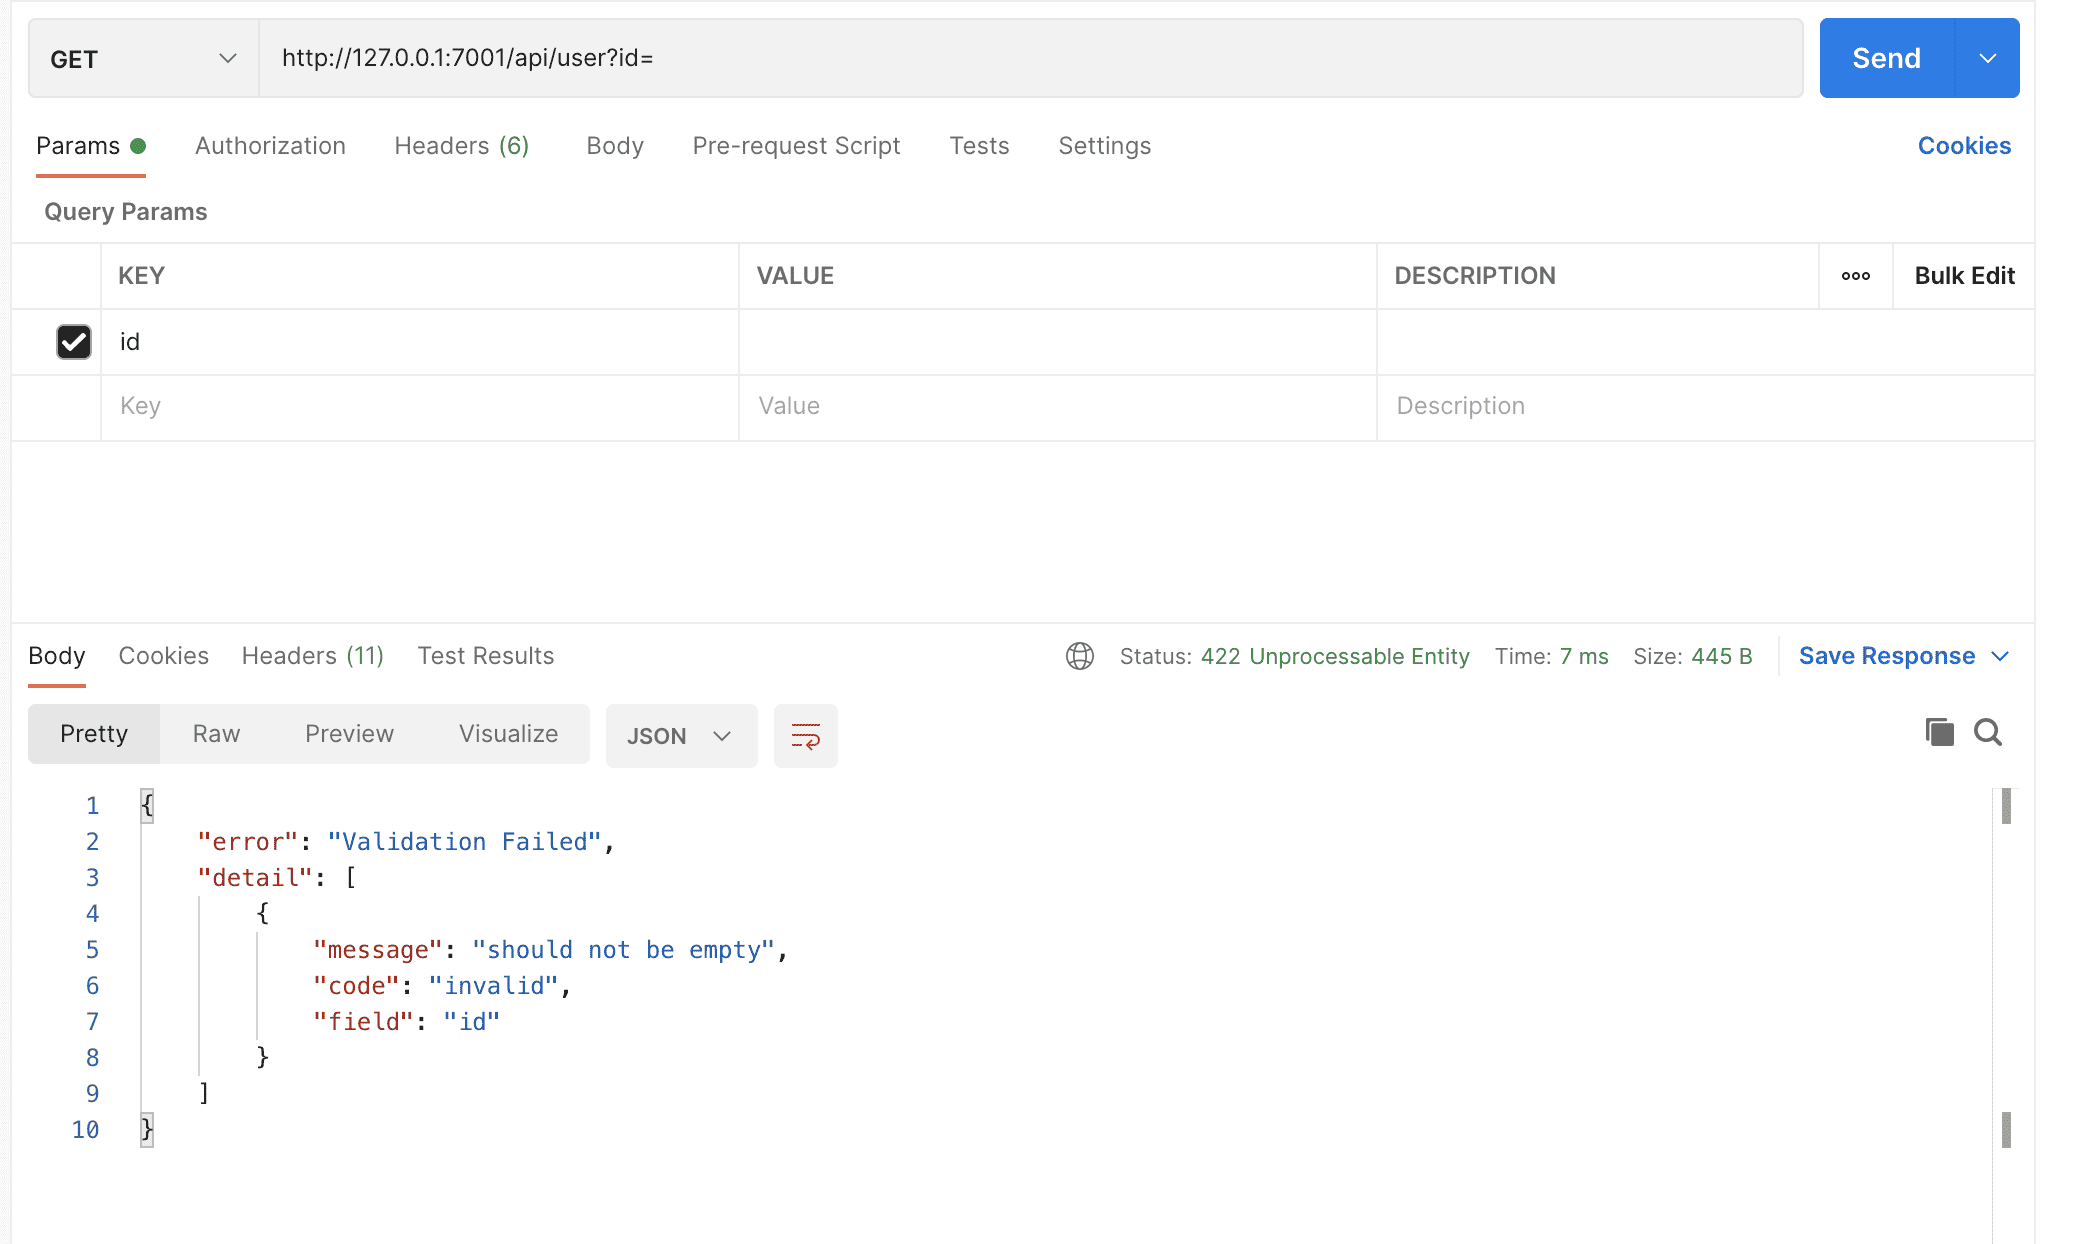
2. 参数校验使用来egg-validate,在plugin.js中注册了,就可以通过this.ctx.validate使用(插件会挂载到ctx上),如果不满足校验规则,则会给出提示,如下
3. findByPk是Sequelize的方法,更多的api可以查看文档
4. 如果在model层中未定义字段,使用create或者find等其他方法的时候就不会插入或者查到该字段。所以如果中途改数据库(例如增加字段,修改字段等操作),一定要在model层及时修改
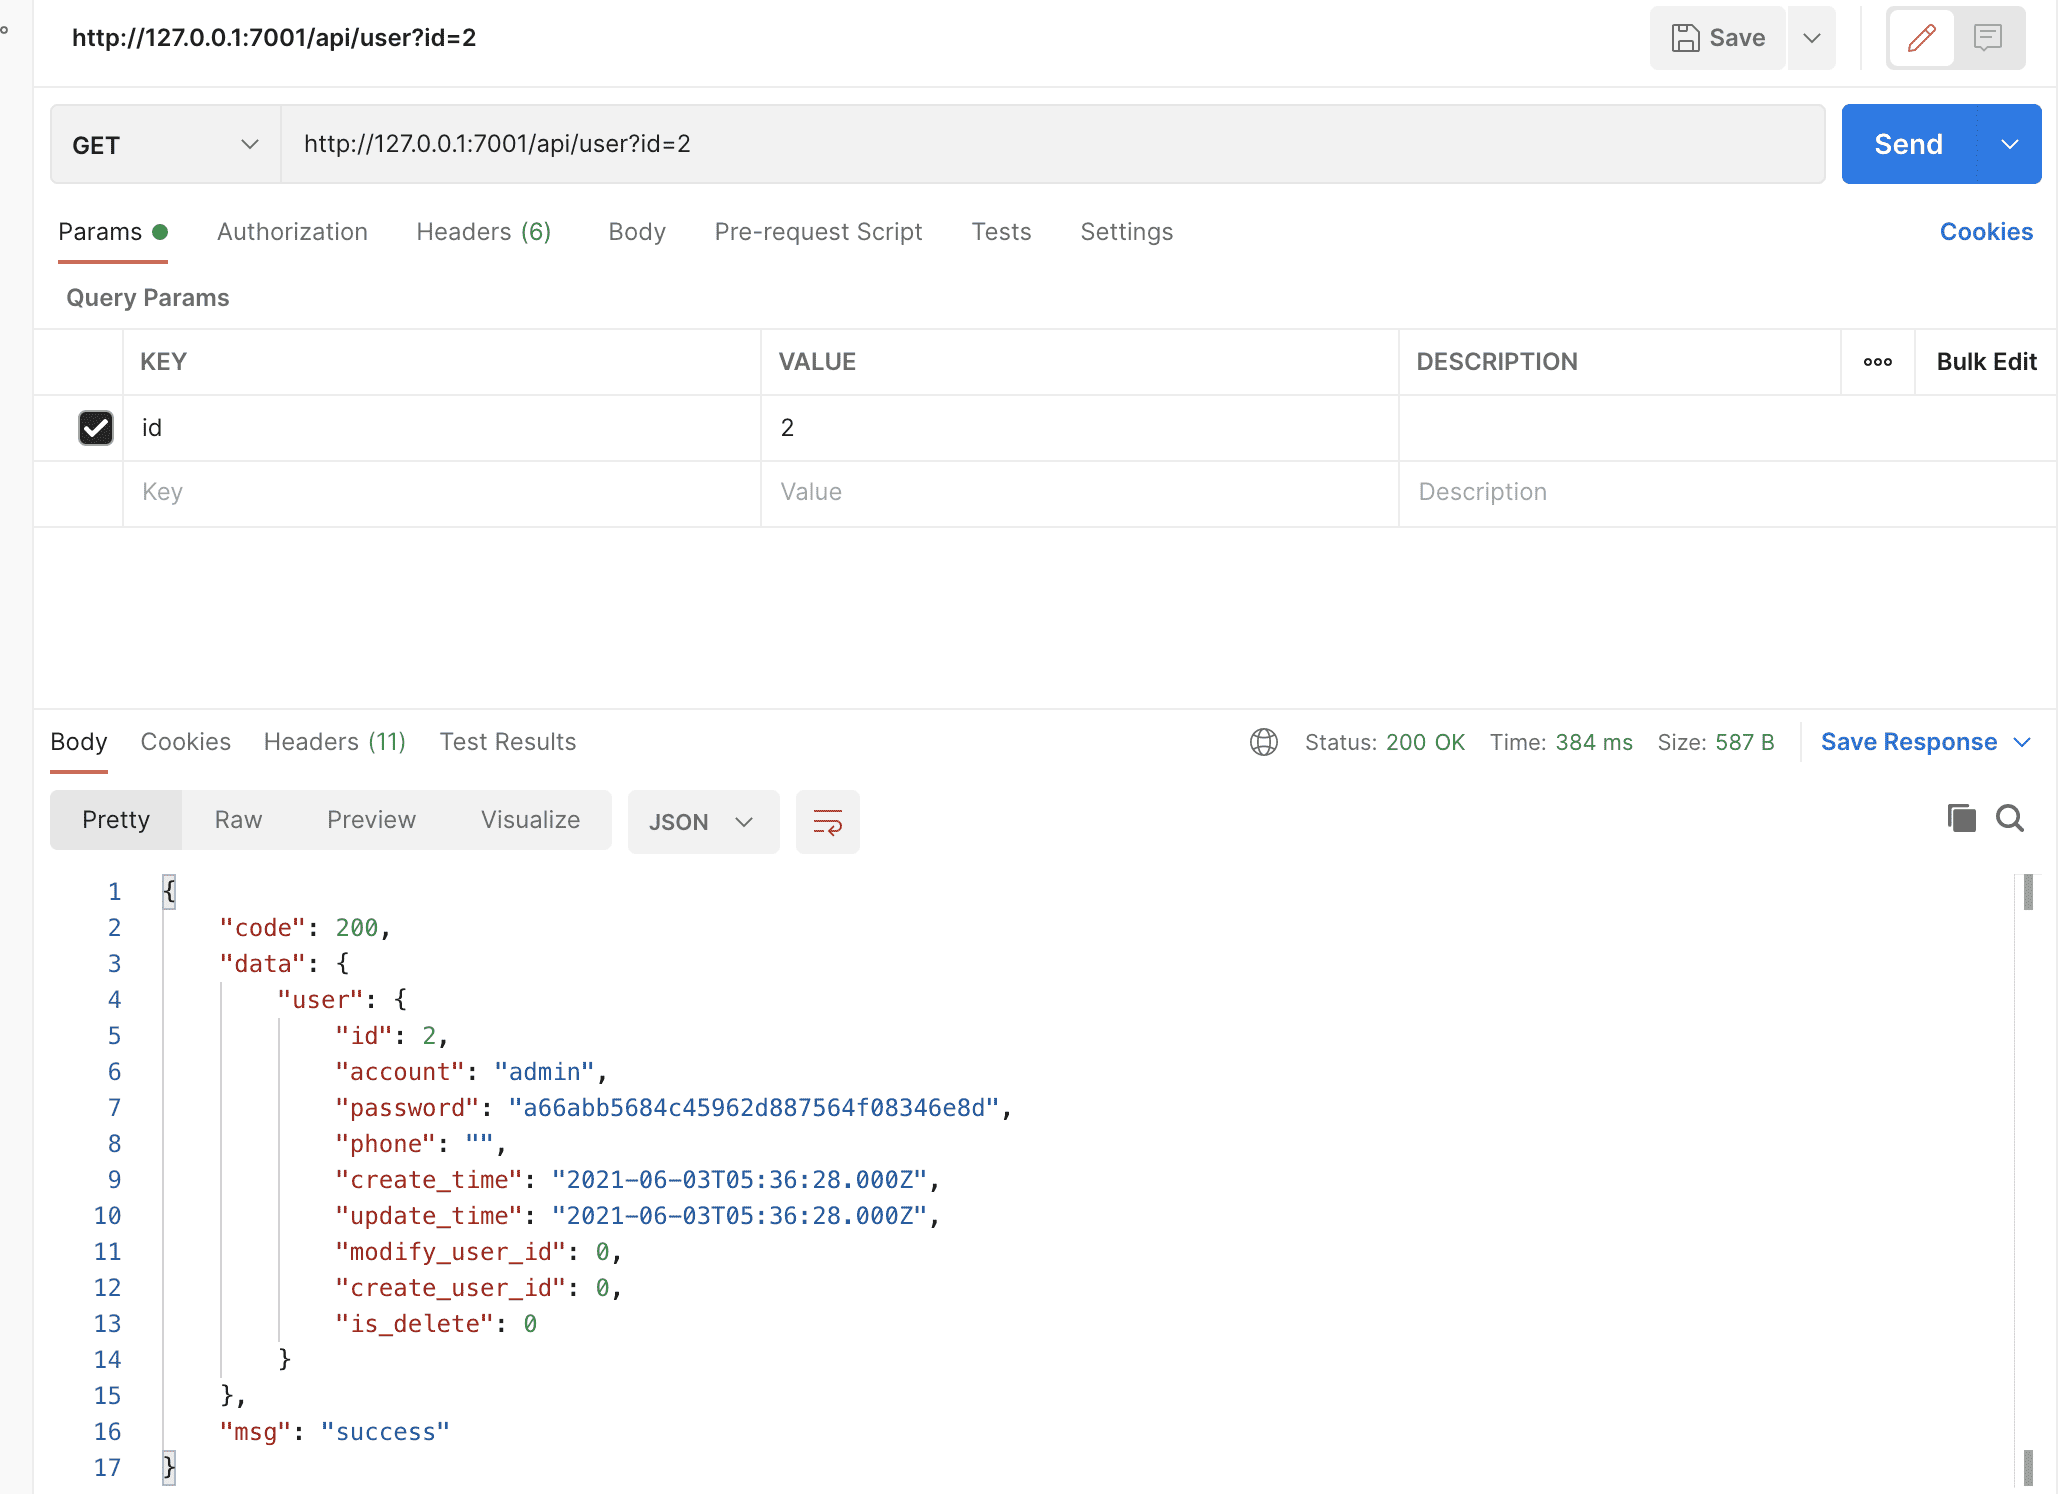
至此,一个简单的查询接口就完成了,效果如下图
总结
总体下来明白了model、service、controller每层的作用,写的时候就清晰很多,更多的就是熟悉Sequelize的api来完成业务。
- 本文链接:https://harry-qi.github.io/2021/08/03/egg%E5%88%9D%E4%BD%93%E9%AA%8C/
- 版权声明:本博客所有文章除特别声明外,均默认采用 许可协议。